
First Time Smart Film Install Guide: 5 Expert Tips (2026)

If you’ve never installed smart film before, the process looks deceptively simple from the outside: film goes on glass, switch goes on wall, done. The reality has more moving parts — and the difference between a first-time install that lands clean and one that costs an awkward rework comes down to a handful of decisions made before any film gets unrolled.
See our full smart film installation service for details.
This is a first time smart film install guide built from the patterns we see on residential and light-commercial retrofits across Los Angeles. It’s organized around the five expert tips first-timers most often wish they’d known on day one, plus what to expect from site measure through the final switch test.
The Problem — First-Timers Guess at the Install
Almost every first-time smart film project starts the same way: someone saw the film flip clear on a video, decided that’s what they want, and then tried to map the decision onto their own glass without much context for what happens between “ordered” and “installed.”
- Sizing gets guessed — buyers quote off window-frame dimensions instead of the actual glass surface, which is smaller.
- Controls get decided last — the wall-switch location, remote option, or smart-home wiring gets chosen after the film is already on the glass, often forcing compromises.
- Expectation mismatch on frosted mode — first-timers assume frosted means dark; it actually means obscured, with plenty of light still coming through.
- DIY attempts — video tutorials make it look easier than it is. Film alignment and bus-bar trim are the two parts where shortcuts show.
All four are fixable with the right prep. That’s what this guide is for.
The Solution — A Guide That Covers the Whole Arc
A good first-install guide covers not just the install day, but everything that happens before it — the site measure, the control decision, the wiring path, the electrician scheduling, and the expectation setting with the client or the other people living in the space. Most first-timer regrets come from skipping one of those steps.
The five tips below sit at the top of the list because they each prevent a specific, repeated failure mode we’ve seen on first-time jobs.
5 Expert Tips Before Your First Smart Film Install
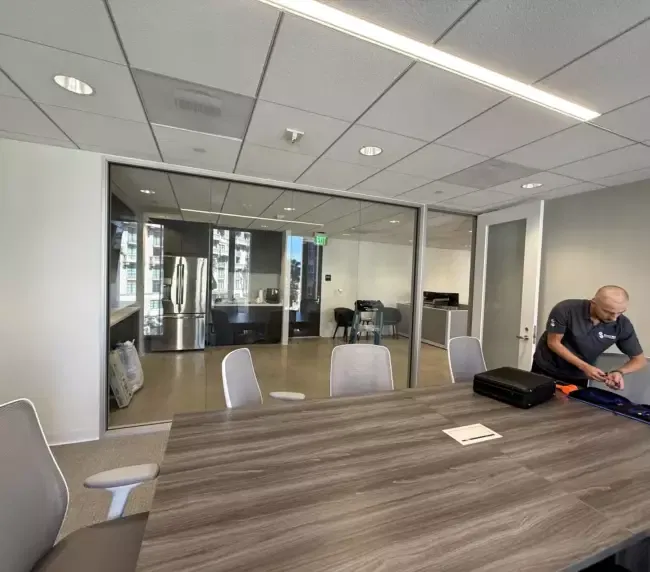
Read this section before you sign anything. Each tip corresponds to a decision you’ll make in the next few days — getting them right now saves change orders and rework later.
- 1. Measure the glass, not the frame. Film applies directly to the glass surface inside the frame. The usable area is always smaller than the rough opening — sometimes by an inch or more per side. Every first-time quote that comes in based on outside dimensions overshoots, and the over-purchase rarely refunds cleanly.
- 2. Decide your control path before the electrician shows up. Wall switch, handheld remote, app, smart-home integration — these aren’t just user preferences, they drive the wiring run. Pick the path early and the electrician pulls the right cable on the first visit. Pick late and you’re opening drywall twice.
- 3. Know the default state is frosted, not clear. When power is off, the film is opaque. That means a tripped breaker, a storm outage, or a remodeling rewire defaults your glass to privacy. First-timers consistently expect the opposite; setting this expectation up front avoids a service call the first time the lights flicker.
- 4. Wire smart-home-ready even if you’re not using an app on day one. Running a smart-home-compatible control leg during the initial install adds very little to the bill. Retrofitting the same leg a year later when you decide you want phone control means pulling the glass, reopening the wall, and rescheduling the electrician. Spend the dollars up front.
- 5. Hire a pro even if you’ve watched the tutorials. Smart film is forgiving in a lot of ways — it’s NOT forgiving on bubble-free application, bus-bar alignment, or edge trim. These are the three things that separate a factory-clean install from one that reads as “installed.” Pros do all three without thinking about it.
Before the Crew Arrives — From Estimate to Fabrication
The journey starts remotely, before anyone sets foot on site. You send photos of your glass and rough dimensions, and you get an estimate with real numbers within one to two business days. Once the project is booked, each pane is measured precisely, and every panel is custom-cut at our Canoga Park facility with the electrical connections factory-applied — then switch-tested before it ever reaches your home.
That off-site fabrication is why install day feels fast. By the time the crew rings your doorbell, the hard part — cutting switchable PDLC film to exact size and wiring it correctly — is already done and verified. The visit itself is application and hookup, not fabrication.
How Long Does a First Install Take?
For most homes — three to five windows — the answer is one day. The crew typically arrives in the morning and has the glass switching by the afternoon. Larger homes with many panes or oversized glass run one to three days, and commercial projects — a floor of conference rooms, a storefront — take one to two weeks depending on scope.
Three things move the timeline: the number of panes, access (a tall stairwell window takes longer than a bathroom window), and how the controls are set up. A single wall switch is quick; whole-home app and voice integration adds time.
What the Install Checklist Looks Like on Site
From the installer side, the checklist for a first-time residential or light-commercial smart film install runs through seven steps. Knowing the sequence as a buyer helps you plan your week and know what’s normal:
- Site measure — the installer records glass dimensions, checks glass type and condition, and confirms the control location you picked.
- Material prep — film is cut to size in a clean environment; bus bars and tabs are prepped on the cut panels before arrival.
- Electrician coordination — if new wiring is needed, the electrician pre-runs the control leg to the chosen switch location before film day.
- Glass prep — cleaning the interior glass face is most of the battle; dust and residue show up as bubbles or delam later if skipped.
- Film application — the film goes on in a controlled sequence, with the installer trimming to the glass edge and seating the bus bar.
- Control tie-in — the low-voltage leg from the driver connects to the bus bar; the switch on the wall gets its final test.
- Final walk-through — installer toggles the glass multiple times, confirms transition speed, and walks the client through care and power behavior.
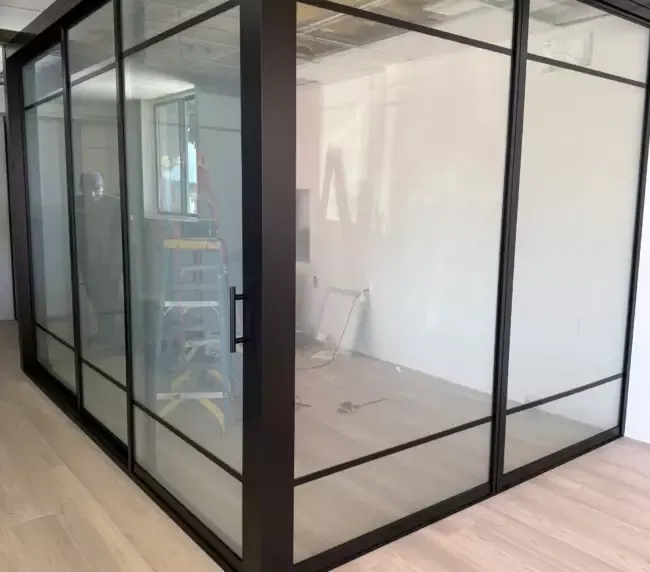
It’s the same sequence we ran on this smart film living room installation in Los Angeles — the photos show how clean a finished wall of switchable glass looks when every step is done in order.
Will There Be Mess, Noise, or Damage to Your Home?
Very little. The film bonds to the interior face of your existing glass, so there is no demolition, no frame changes, and your windows stay exactly where they are. Drop cloths go down before work starts, and most of the day is quiet — cleaning, positioning, squeegeeing. The loudest moments are usually a drill making a small path for the wiring, which then runs concealed from the film’s edge connector into the frame or wall, back to a small transformer.
You can make the day easier with ten minutes of prep: move furniture a few feet back from the glass, take down curtains or blinds on the windows being worked on, and keep pets out of the work area so the glass stays dust-free during application.
Switch-On — Testing, Controls, and the Handoff
The last hour of install day belongs to testing. Every panel is powered up and cycled between clear and frosted, and the crew walks you through your controls — wall switch, remote, app, or voice, depending on what you chose. Before leaving, the crew covers day-to-day care and answers your questions — and every install is backed by our 1-year workmanship warranty, so you keep a direct line to us if anything ever needs attention.
Common First-Timer Mistakes We See On Site
Even with a guide like this in hand, a few mistakes repeat frequently enough to flag specifically:
- Scheduling film day before the electrician finishes. The film crew can’t test the glass without power; this becomes a return-visit fee if the sequence gets flipped.
- Choosing a wall-switch spot based on the existing light switches. The best smart-film switch location is rarely the same place as the main light switch — think about where your hand naturally lands when you want privacy.
- Forgetting about bathroom humidity. Smart film works fine in bathrooms, but the wiring terminations need proper sealing; standard indoor wire caps aren’t rated for steam exposure.
- Skipping the transformer location call-out. The low-voltage driver has to live somewhere accessible — inside a cabinet, ceiling cavity, or utility closet. Surprise at final walk-through is preventable with a 30-second conversation on measure day.
First-Install Questions We Hear Most
Do I need to be home during the work?
Someone needs to let the crew in and be reachable during the day, and you’ll want to be there at the end for the controls walkthrough. Beyond that, you can work from another room — the crew doesn’t need you standing by.
Can I use the room the same day?
Yes. Every panel is tested and switching before the crew leaves, and the room goes back into normal use the same day.
How much does a professional install cost?
A single small window usually starts around $1,500 fully installed and scales with glass area and the controls you choose. Our smart glass cost page breaks down what drives the number for film and glass projects.
A Bathroom Install Parallel in Pasadena
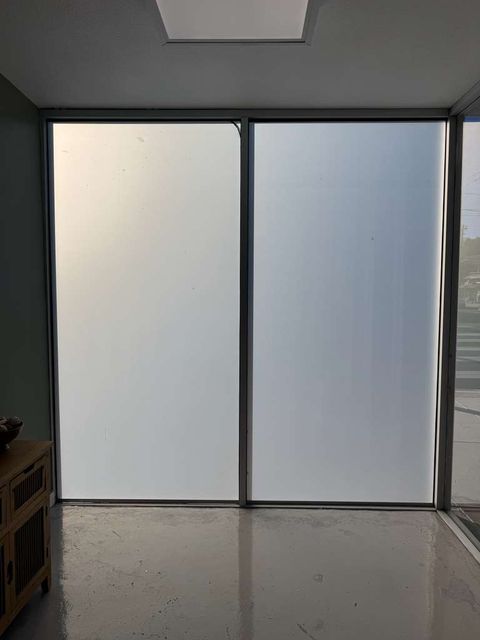
For a project that puts this guide into practice in a single room, our Pasadena bathroom-window install is the cleanest parallel. It’s the archetypal first-time scenario — homeowner wants on-demand privacy on a street-facing bathroom window, and nobody in the house has ever spec’d smart film before.
Full project breakdown: smart glass on a Pasadena bathroom window — same install arc as this guide, condensed to one room.
Planning Your First Install?
If you’re about to spec your first smart film install and you want to skip the first-timer mistakes, the cleanest starting point is a quick site measure and control conversation. We’ll walk you through room size, control options, wiring, and timeline on a short consult — no pressure, no templates.
Contact Smart View or call (866) 728-9888 with photos and rough sizes of your glass for a straight quote and an honest first-project estimate on cost, install timeline, and what to expect from measure day forward.